Garage Openers - PFC CONTROLS | Miami, Gate Operators, Sliding Gate, Swing Gate, Intercoms, Turnstiles, Bollards, Barrier gate

MENU
Go to content

7 Tips for Choosing the Best Food Sealer Machine?

Choosing a Food Sealer Machine can seem simple until you compare bag types, controls, and sealing performance. A model that works well for dry snacks may struggle with juicy leftovers. Small details matter. Check whether the machine accepts the bags you can readily buy, and look at the maximum bag width before placing an order. A narrow seal strip can be inconvenient when you portion larger cuts of meat or bulk ingredients. The display matters, too. Clear buttons and an understandable manual make everyday use less frustrating.

These seven tips focus on practical checks rather than impressive-sounding claims. Consider suction settings, pulse control, sealing time, countertop space, and how easily the drip tray or sealing channel can be cleaned. If you often package moist foods, look for instructions on handling liquids and verify the model’s guidance before use. Read the manufacturer’s specifications, then compare them with the foods and bag sizes you actually plan to seal. It is also worth checking replacement-part availability and warranty terms. Not glamorous. But useful. Price can be tempting, and I would not ignore it; still, a low-cost machine may disappoint if its bags are hard to find or its controls feel awkward. No single feature guarantees a good fit. Think about your kitchen routine, expected use, and storage needs before deciding. A little careful comparison can help you choose confidently, while leaving room to reconsider if your needs change.
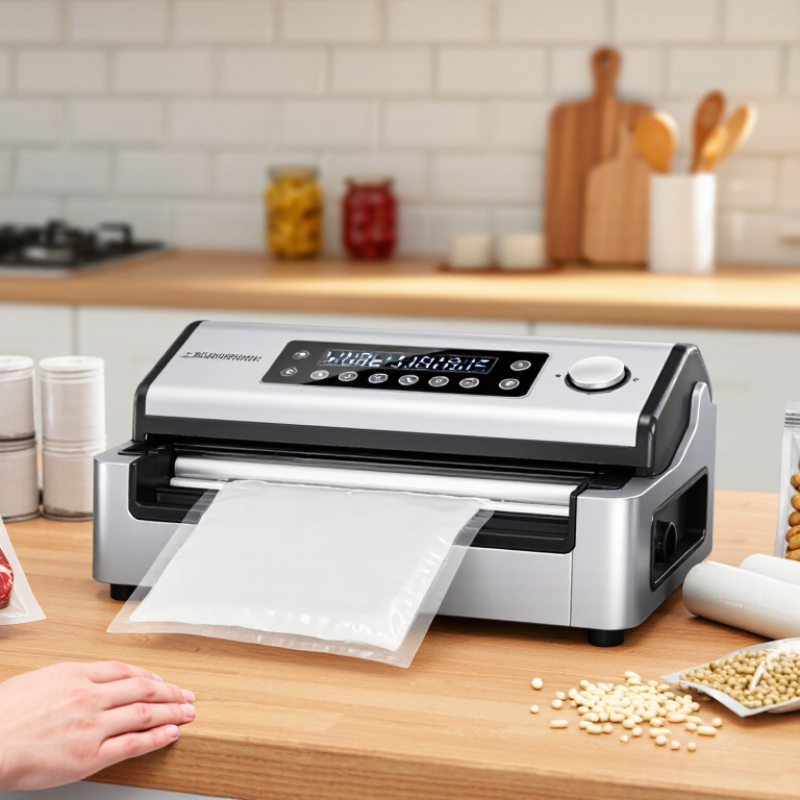
7 Tips for Choosing the Best Food Sealer Machine?

Define Product, Package, and Daily Throughput Requirements

7 Tips for Choosing the Best Food Sealer Machine?

Define the food product before comparing machines. Moist foods, dry grains, powders, and oily snacks behave differently during sealing. A soup pouch may need stronger temperature control, while sliced meat requires careful air removal. Check the product’s moisture, shape, and storage needs. Test real samples, not empty bags. That detail matters.

Tip 1: Match the package.

Measure bag width, thickness, and material before buying. A narrow countertop unit may suit small pouches, but larger bags need a wider sealing bar. Consider whether you need vacuum sealing, heat sealing, or both. In my experience, uneven package edges often cause weak seals. It is an easy problem to overlook.

Tip 2: Calculate daily throughput honestly.

Count packages per hour, including loading, cleaning, pauses, and seal checks. A machine rated for high output may slow down with wet products or frequent bag changes. Leave some capacity for busy days. Not every production line runs perfectly.

Tip 3: Ask for a practical trial using your product and packaging.

Inspect seal width, air removal, cycle time, and operator comfort. Record failed seals instead of hiding them. Clear controls, replaceable parts, and simple cleaning procedures also support reliable daily use.

Compare Chamber, External, and Band Sealers by Bag Type and Output

Choosing the best food sealer machine starts with the bag, not the machine. Chamber sealers work well with smooth pouches and liquids because they remove air from the entire chamber. External sealers need embossed or textured bags, but they usually cost less and suit small batches. Band sealers handle continuous production and thicker laminated bags. Check compatibility carefully. A perfect machine with the wrong bag still fails.

Output matters just as much. Grand View Research valued the global vacuum packaging market at approximately USD 29.6 billion in 2023, showing strong demand for efficient preservation. For occasional sealing, measure cycles per minute and cooling time. For commercial work, compare conveyor speed, seal width, and duty rating. Band models often provide steadier throughput, while chamber units offer better control for wet products. Faster is not always better.

Inspect the seal by pulling the pouch gently. Look for wrinkles, weak corners, or trapped moisture. In practical trials, small temperature changes can alter seal strength more than expected. I would test at least three bag materials before purchasing.

Food loss remains significant; the FAO estimates that 13.2% of food is lost before retail. A reliable seal can help, but it cannot correct poor storage or careless loading.

Include cleaning access, replacement parts, energy use, and operator training in the real cost. Fancy specifications can distract. Test the machine on your busiest day.

Match Pump Capacity and Seal Width to Your Required Cycle Rate

Choosing the best food sealer machine starts with your required cycle rate. Pump capacity controls how quickly air leaves each pouch. A stronger pump can shorten evacuation time, but it does not solve every production problem. Count your real workload during the busiest hour. Include loading, positioning, sealing, and removal. If one pouch needs 25 seconds, a machine rated for faster cycles may still slow down through manual handling. Watch the workflow. Small delays become expensive.

Seal width must match both pouch size and product conditions. A narrow seal may suit small dry portions, while wider seals provide more security for heavy or moist contents. Leave enough clean film around the product. Liquid near the seal can create weak spots, even with a powerful pump. Measure your largest pouch before buying. Do not rely on a sample bag alone. In practical equipment checks, operators often discover that the advertised cycle assumes ideal loading. Your production floor may be messier. Test several pouch sizes, temperatures, and fill levels. Record the actual cycle time, seal consistency, and rejected packs. A larger pump is not automatically better. It may increase cost, noise, and energy use without improving output. I once underestimated loading time during a small trial, and the calculated capacity looked unrealistic. A short, supervised test can expose that mistake early.

7 Tips for Choosing the Best Food Sealer Machine? - Match Pump Capacity and Seal Width to Your Required Cycle Rate
Tip Selection Dimension Practical Reference Data Recommended Matching Rule Why It Matters
1 Define the required cycle rate Typical chamber-vacuum-sealer output ranges: 2–6 cycles per minute for small operations, 6–15 cycles per minute for medium production, and approximately 15–30 cycles per minute for automated or multi-chamber systems. Select equipment that can deliver at least 15–25% more capacity than the calculated peak requirement. Required cycles/min = Units per hour ÷ 60 Extra capacity helps absorb loading variation, product changes, and operator delays without creating a production bottleneck.
2 Match pump capacity to chamber volume Common vacuum-pump capacities are approximately: 4–8 m³/h for compact machines, 10–25 m³/h for medium machines, and 25–63 m³/h for larger industrial systems. Use a larger pump for larger chambers, frequent cycles, liquid-rich products, or short target vacuum times. Pump capacity alone does not determine final vacuum level. An undersized pump increases evacuation time and reduces the number of completed cycles per hour.
3 Choose the correct seal-bar width Common sealing widths include 3–5 mm. Typical single-seal lengths range from approximately 250 mm to 1,000 mm, depending on machine size. The seal length should be at least 10–20 mm longer than the widest section of the bag, while leaving enough clearance for positioning. A suitable seal width provides reliable closure and reduces the risk of wrinkles, trapped product, or incomplete seals.
4 Calculate bag loading efficiency One large bag may be sealed per cycle, while smaller bags may be arranged as 2–8 bags per cycle depending on chamber dimensions and seal-bar layout. Compare machines by output per hour, not only by cycle time: Output/hour = Bags per cycle × Cycles/hour A machine with a slower cycle can still produce more finished packages if it accommodates more bags per cycle.
5 Check the complete cycle time A practical chamber cycle often includes: 10–30 seconds for evacuation, 1–3 seconds for sealing, and 2–8 seconds for venting and lid operation. Estimate total cycle time using: Cycle time = Evacuation + Sealing + Venting + Loading
Always include manual loading and unloading time in labor calculations.
The advertised vacuum time may exclude handling time, so real production output can otherwise be overstated.
6 Account for product characteristics Dry solid products usually require less process control than products containing free liquid, powders, sharp edges, or high gas content. Liquid products may need a lower vacuum level, shorter evacuation, or a liquid-control program. Select adjustable vacuum settings, gas flush capability, or liquid protection when the product can boil, foam, or migrate toward the pump. Product behavior affects vacuum stability, seal cleanliness, pump protection, and repeatable package quality.
7 Verify utilities, maintenance, and duty rating Many commercial systems require approximately 220–240 V single-phase power, while larger equipment may require three-phase power. Oil-lubricated pumps require regular oil inspection and replacement according to operating conditions. Confirm electrical load, chamber clearance, ventilation, daily operating hours, spare seal wires, gasket availability, and pump service access before purchase. A machine that matches the production target but exceeds available utilities or maintenance capability can create avoidable downtime.
Planning note: The figures shown are practical industry reference ranges for preliminary equipment selection. Actual performance depends on chamber volume, bag material, product temperature, target vacuum level, operator loading time, and machine configuration. Validate the final choice with a production trial using the intended product and packaging material.

Evaluate Seal Strength Using ASTM F88 Test Criteria

7 Tips for Choosing the Best Food Sealer Machine

A strong-looking seal is not always a reliable seal. ASTM F88/F88M evaluates seal strength by measuring the force needed to peel sealed flexible materials apart. This test helps compare machines under controlled conditions. In practice, I would test the same pouch material, seal width, temperature, and dwell time for every machine. Small changes can affect the result. Record the average force, but also inspect how the seal fails. A clean peel differs from film tearing or uneven separation.

Tip 1: Ask for ASTM F88 test data, not vague claims. Tip 2: Request the tested material and settings. Without those details, comparisons may be misleading. Tip 3: Check whether the machine creates a consistent seal across the full width. A strong center with weak edges is still a problem. Keep samples.

For a useful evaluation, cut sealed strips to consistent widths and test them with suitable laboratory equipment. ASTM F88 focuses on seal strength, not complete package integrity or leak resistance. You may need separate leak testing for that purpose. Tip 4: Examine seals after refrigeration, handling, and mild flexing. Tip 5: Repeat tests across several production cycles. One excellent sample proves very little. Tip 6: Consider temperature control and pressure adjustment. Tip 7: Choose controls that operators can reproduce easily. I would also leave room for retesting, because real packaging conditions are rarely perfect. Safety and consistency matter more than an impressive single reading.

Check Leak Integrity and Food Safety Against ASTM F1929 and 41°F (5°C) Cold-Holding Guidance

When comparing a food sealer, inspect the full seal, not just its neat appearance. Wrinkles, crumbs, or a thin channel can let air and moisture through. ASTM F1929 uses dye penetration to find channels in seals on porous packaging, but it is not a universal food-package certification. Check that the test method fits your packaging material, and follow its procedure. A simple trial with your actual bag and food can reveal problems a showroom sample hides.

Tip: Seal a clean, dry test bag, then inspect the seam under bright light. For critical checks, use a suitable validated method; visual inspection alone cannot prove leak integrity. Small gaps matter.

Sealing does not replace safe chilling. For time/temperature control foods, FDA Food Code guidance generally calls for cold holding at 41°F (5°C) or below; check the rules that apply where you operate. Chill food promptly, store sealed packs in a refrigerator, and verify temperatures with a calibrated probe thermometer. Record readings, especially after loading a crowded fridge. I would not trust a cold setting on a dial by itself. Even a strong seal cannot make food safe if it stayed warm too long.

PFC CONTROLS
1638 NW 108TH AVE. MIAMI, FL 33172
Sales: (305) 593-0227
Tech: (305) 546-3965

Copyright, All rights reserved
Back to content