How to Replace Cabin Filter in Your Car Easily?
Changing the Cabin Filter in your car can seem daunting. Yet, it’s a simple task that anyone can handle. The cabin filter plays a crucial role in ensuring clean air inside your vehicle. It traps dust, pollen, and other pollutants. When this filter becomes clogged, air quality suffers. This can lead to discomfort during drives.
Imagine driving with fresh, clean air flowing through your vehicle. You can breathe easier, especially during allergy season. However, many people neglect the need to replace the cabin filter regularly. Over time, elements can build up and impact your health. It’s a small part, but it has a big impact. There are signs that indicate when it’s time for a replacement.
You might notice decreased airflow from your vents. Or you may detect unusual odors when the air is on. These hints suggest it’s time to replace your cabin filter. This guide will show you how to do it easily. With a few tools and a bit of time, you’ll have fresher air in no time. Taking this step is not just about comfort; it’s about your well-being.
Understanding the Importance of a Cabin Filter in Your Car
The cabin filter plays a crucial role in maintaining air quality within your vehicle. It filters dust, pollen, and other particulates. When you drive, fresh air enters through the filter, keeping the cabin atmosphere clean. A clean cabin filter improves comfort for passengers. It also helps prevent the buildup of allergens.
However, many car owners often overlook this essential component. It's easy to forget it exists until you notice a significant drop in air quality. A clogged filter can also lead to poor airflow from the ventilation system. This can make your car feel stuffy. Regularly replacing the cabin filter can save you from frequent trips to the mechanic. It’s a simple task that requires minimal tools and time.
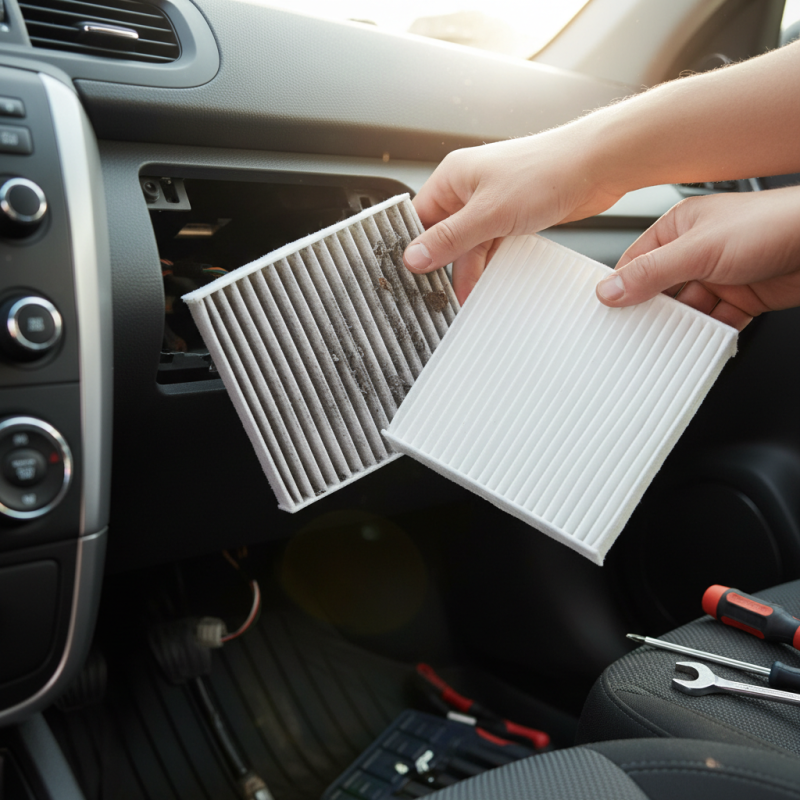
Don’t underestimate the effects of a dirty filter. You may experience headaches or fatigue due to poor air circulation. Your car may smell musty, which is not pleasant. Regular maintenance can prevent these issues and improve your overall driving experience. Taking care of your cabin filter is a small step, but it brings notable benefits. Remember, small things can lead to big changes over time.
Identifying the Right Cabin Filter for Your Vehicle Model
When you decide to replace the cabin filter in your car, the first step is to identify the right filter for your vehicle model. You can't just grab any filter you see. Each vehicle has specifications that must be followed. Check your owner’s manual for details. This document often lists the correct part number for the cabin filter.
Another way to find the right filter is to search online. Use your car’s make and model. Websites dedicated to automotive parts can help. They usually provide clear options based on your needs. Yet, this method has its drawbacks. Sometimes, images can be misleading. A filter that looks correct may not fit your system properly.
Don't forget to consider the quality of the filter. Some may look appealing but lack efficiency. Always compare options. User reviews can offer insights into performance. In the end, getting the right filter may take time. It's better to do it right than to rush and make mistakes. Keeping your cabin air clean is worth the effort.
Tools Required for Replacing Your Cabin Filter
When replacing a cabin filter, having the right tools makes the job easier. First, you typically need a flat-head screwdriver. This tool helps open the car's cover panel. A pair of gloves is also important. They protect your hands from dust and debris.
Additionally, you might need a flashlight. Sometimes, the filter is in dark areas. A flashlight will help you see everything clearly. If you have a vacuum cleaner with a hose attachment, use it. It can clean any loose dirt around the filter area.
It’s easy to overlook some details. For instance, check if the new filter fits well before installation. A poor fit can lead to air leaks. Take your time to ensure everything is secure. Rushing through the process may lead to missed steps. A well-done job will improve your car's air quality.
Step-by-Step Guide to Safely Remove the Old Cabin Filter
Replacing the cabin filter in your car can feel daunting, but it’s straightforward once you get the hang of it. Start by locating the cabin filter, usually behind the glove box or under the dashboard. Clear away any items in this area. This step can be messy. Keep a vacuum handy if dust flies.
Remove the screws or clips holding the glove box in place. Be careful with these. They can easily drop or get lost. Once you detach the glove box, you’ll see the cabin filter. It might be dirty and clogged. Pull it out gently to avoid spilling debris.
Before you install the new filter, check for any damage to the housing. It’s easy to overlook this. Cleaning the area might reveal hidden dirt. Align the new filter properly before pushing it in. Remember the airflow direction marked on the filter. Misalignment can lead to poor air quality. Finally, reassemble the glove box, ensuring it’s securely fastened. Take a moment to appreciate your work; it’s a small victory!
Installing the New Cabin Filter Correctly and Efficiently
Replacing the cabin filter in your car can greatly improve air quality. To do this efficiently, you’ll need a few tools. A screwdriver and a new cabin filter are essential. Make sure to locate the right part for your vehicle; the user manual can be a helpful guide.
Once you gather your tools, find the cabin filter compartment. It’s often behind the glove box. Carefully open it, and you might need to disconnect a few clips. Remember to take your time here. Rushing can lead to broken clips. After accessing the old filter, note its orientation. It’s crucial to install the new one in the same way.
When inserting the new filter, ensure it fits snugly. It should not wiggle around. Once in place, reassemble any removed parts carefully. A wrong reassembly could create noise or air leaks. It’s a simple process, yet attention to detail matters. If things feel off, double-check your work. Sometimes, the simplest tasks require a moment to reflect and adjust.
How to Replace Cabin Filter in Your Car Easily?
| Step | Action | Tools Required | Estimated Time (mins) |
| 1 | Locate the cabin filter compartment | None | 2 |
| 2 | Remove the cover of the cabin filter | Screwdriver | 3 |
| 3 | Take out the old cabin filter | None | 2 |
| 4 | Insert the new cabin filter | None | 2 |
| 5 | Reattach the cover | Screwdriver | 3 |
| 6 | Test the air flow | None | 5 |